-->

Wednesday, March 27, 2013

Spring Wedding Trinket Box

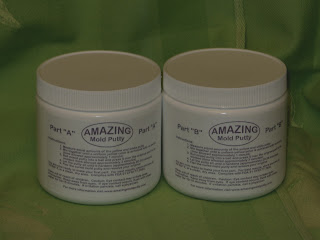
Our family is so excited in the planning of our middle daughter's wedding this April. There will many goodies to distribute, so I made this little trinket box for "something old, something new, something borrowed, something blue." I pulled out my faithful jars of Amazing Mold Putty A and B. Be sure to grab equal parts of each so that the mix is correct. Knead the 2 parts together til uniform in color.
As you can see I made 2 perfect replicas of an egg half and antique button. I added tan paint to the egg and ivory to the button. I also applied 3D Crystal lacquer to give the button some shine.
This is the bottom half of the box. I lightly stenciled a hexagonal motif in warm brown ink to add interest to the box.
Although small, I think it is just the right size for presenting a tiny treasure. The eggs are in keeping will the wedding theme birds, eggs and nests. Amazing Mold Putty is always a constant in my craft corner. Have a Happy Easter!!!!!!!!!!!

Joyce

Friday, March 1, 2013

Paperweight artwork

Welcome to the Amazing Mold Putty Blog Hop.  We are so glad you came.  Be sure to hop by and see all the wonderful art work.
I decided to use casting resin for these projects.  Use package directions in measuring amounts and projects will turn out nicely.
 
This is the first mold I made to form the half-circle paperweight.  As usual use equal parts A & B of molding medium and knead until mix is a uniform color.
 
 
Here is a picture of the mold and finished paperweight.  The photo doesn't do the sparkly surface of the globe justice. The casting medium accepted beautifully the colors added making lovely jewel tones on the paperweight.
 
 
Maybe a better picture of the globe.  You can see the purples, pinks and greens.
 
 
I did not show a mold this time of this antique hand but the process is the same, I used a moss green patina and antique gold to accent the piece.  Thanks for stopping by, enjoy the other artists.
Joyce


Monday, January 28, 2013

St. Valentine's Day Embellishment


Hi there to all of you Amazing Mold Putty fans, Joyce here with a little Valentine's Day embellishment for your sweetie.  We begin as usual by taking equal parts A + B and kneading them to a uniform color.


Here is the mold finished and dried.  I used a puffy heart earring I only have one of. (see remember to use those bits and pieces you have lying around the house, they make wonderful molds.)


I used polymer clay here but either clear colored or opaque Amazing Resins would have been great too.  Notice the perfect reproduction.


Here is the embellishment, baked and trimmed.


I used Liquid Pearls, Martha Stewart's ultra-fine glitters to color the heart.


After I photographed this I realized how much it looked like a diamond and ruby broach.


Here it is, attached to the card/booklet for my sweetie.  This little heart gives the card quite a "pop".  Just think of all the items you can think to mold to add dimension to your cards and art work!!
Hope your Valentine's Day is ever so sweet,  see you next month.