-->

Wednesday, March 27, 2013

Spring Wedding Trinket Box

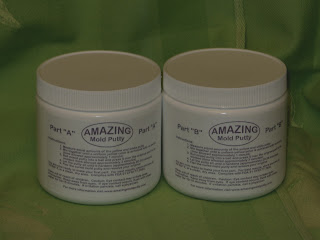
Our family is so excited in the planning of our middle daughter's wedding this April. There will many goodies to distribute, so I made this little trinket box for "something old, something new, something borrowed, something blue." I pulled out my faithful jars of Amazing Mold Putty A and B. Be sure to grab equal parts of each so that the mix is correct. Knead the 2 parts together til uniform in color.
As you can see I made 2 perfect replicas of an egg half and antique button. I added tan paint to the egg and ivory to the button. I also applied 3D Crystal lacquer to give the button some shine.
This is the bottom half of the box. I lightly stenciled a hexagonal motif in warm brown ink to add interest to the box.
Although small, I think it is just the right size for presenting a tiny treasure. The eggs are in keeping will the wedding theme birds, eggs and nests. Amazing Mold Putty is always a constant in my craft corner. Have a Happy Easter!!!!!!!!!!!

Joyce

Friday, March 1, 2013

Paperweight artwork

Welcome to the Amazing Mold Putty Blog Hop.  We are so glad you came.  Be sure to hop by and see all the wonderful art work.
I decided to use casting resin for these projects.  Use package directions in measuring amounts and projects will turn out nicely.
 
This is the first mold I made to form the half-circle paperweight.  As usual use equal parts A & B of molding medium and knead until mix is a uniform color.
 
 
Here is a picture of the mold and finished paperweight.  The photo doesn't do the sparkly surface of the globe justice. The casting medium accepted beautifully the colors added making lovely jewel tones on the paperweight.
 
 
Maybe a better picture of the globe.  You can see the purples, pinks and greens.
 
 
I did not show a mold this time of this antique hand but the process is the same, I used a moss green patina and antique gold to accent the piece.  Thanks for stopping by, enjoy the other artists.
Joyce


Monday, January 28, 2013

St. Valentine's Day Embellishment


Hi there to all of you Amazing Mold Putty fans, Joyce here with a little Valentine's Day embellishment for your sweetie.  We begin as usual by taking equal parts A + B and kneading them to a uniform color.


Here is the mold finished and dried.  I used a puffy heart earring I only have one of. (see remember to use those bits and pieces you have lying around the house, they make wonderful molds.)


I used polymer clay here but either clear colored or opaque Amazing Resins would have been great too.  Notice the perfect reproduction.


Here is the embellishment, baked and trimmed.


I used Liquid Pearls, Martha Stewart's ultra-fine glitters to color the heart.


After I photographed this I realized how much it looked like a diamond and ruby broach.


Here it is, attached to the card/booklet for my sweetie.  This little heart gives the card quite a "pop".  Just think of all the items you can think to mold to add dimension to your cards and art work!!
Hope your Valentine's Day is ever so sweet,  see you next month. 


Thursday, December 27, 2012

Cupcake Topper


Hi hope everyone had a Merry Christmas.  I know I did.  This idea came to me because it seems everyone is into cupcakes these days, so now you can make your own toppers so easily with Amazing Mold Putty.  Above are parts 1 and 2 plus blue dye for the clear cast resin.


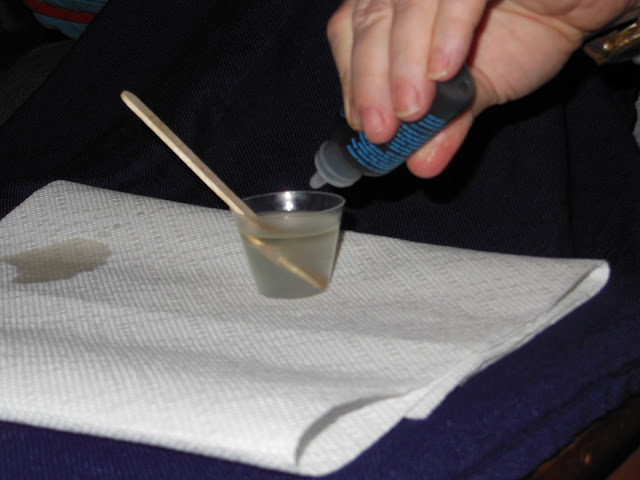
 Here I am adding blue dye to parts 1 and 2 which has been mixed according to package directions.  


The dye has been added, try to be sparing with the dye as it is intense.  I will stir this until evenly mixed.

 As you can see the mixture is uniform in color and ready to pour.


This is the mold and antique glass fixture will be what I use for the topper.


Here I am pouring the Clear Cast Resin into the Amazing Mold Putty mold.


As you can see I have accidentally overfilled.  Not to worry, when it's dried you can trim off the excess.  The  casted item will pop right out.


The two cupcakes are ready for their toppers.


Cupcakes!!!!  Silver edible glitter on this one, plus a sprig of flowers.


Another mold, red this time for the season.


Second cupcake complete, ready to eat.  Have a great New Year, see you next month.

Thursday, November 8, 2012

Spooky Head Mold

 
Hi everyone and Happy Halloween. I am so glad to be on this Design Team and share my very first post. I thought something spooky was in order. I do love using the putty and
incorporating it into a collage. Edgar A. Poe is probably the father of the American suspense and horror literature. I so enjoy using real life people in my work, and it was a natural choice for me to select Poe. Let's begin: Take equal amounts part A and B putty, knead them together until color is uniform throughout the mixture.

These are the large jars of putty, and boy am I glad to have them for this project, because it was large and reguired quite a bit. Amazing Mold Putty is also sold in smaller amounts, but there are so many great projects one can do, large is best.


This is an antique doll head primed and ready to use for another project. I thought it would make a great mold. It does have some crackles (adds character, don't you think?).


This is the mold, cured, ready to use.


I inserted Sculpey into the mold ensuring not to press too hard around the features of the face. I did once and trust me your work will look like Porky Pig. Gentle touches are best, be sure that the clay is conditioned fully before use.


This is the finished clay, removed from the mold, baked, a faithful likeness of the original despite the macabre touches I added, "red to represent red death" and a touch of gold and black on the cheeks and lips.


This is the canvas prepared by painting, stenciling,and general altering with paint and ink.


Assorted ephemera, all copies of originals from a mini bio. of Mr. Poe. Some of it is written in his own hand. Letters spelling "mask" are also seen.


This is the finished piece. The 3-D mold adds so much to the interest of the art. Mold putty is a wonderful addition to your art supply closet. Versatile, easy to use, inspires creativity, are all apt descriptions of ths fine product. Thanks for stopping by. Hope you join us regularly. Comments are appreciated. Have a great Thanksgiving and spooky Halloween. Joyce

Friday, September 21, 2012


My Elepunk 


This litle guy and his wagon were so much fun to make.  The elepunk is fashioned fron a child's air dry clay.  He is "jointed with gears", has a monacle of a gear also.  His hat is made from  chipboard ,felt and trimmed in autumnal splendor..  The paper mache top hat was painted black, with plaid ribbon added.  Tim Holtz pulley wheels make the hat a wagon, Tim's gear die cuts are distressed in metallic paint, secured to hat by wires.  We, as artists, take our inspiration from many things, nature , the weather, tv, other artists.  My inspiration for this project  was my always- there-for-me BFF, Barbara, and Nicole E.  Thanks for stopping by, enjoy the beginning of a glorious fall.  Enjoy the other fabulous artists in the hop.
Joyce


Happy Hauntings Playground entry for Graphic 45


Here is my entry for the autumn Graphic 45 contest.  The playground is made of a Bundt pan covered in moss and sunflower paper.  Around the base is a spooky fence and wooden pumpkins paper-pieced.  Over the "hillside" are children tumbling in the fall sun.  They have been re-enforced
with chipboard.  Here and there on the grass you will see little sunflower blossoms, blinged in the center.  My favorite constuction is the tree made of "twig wire",.  Autumnal leaves are adorning it,
but almost gone   Hope you enjoy my offering, thanks for dropping by.
You can see my project as well as many other wonderful projects by clicking on the site below.  I would of course love your vote.  Thanks again.
Joyce